Adding a layout grid
Set up and customize layout grids to keep designs aligned and consistent across breakpoints.
Layout grids help you align and organize elements on the canvas so layouts feel balanced, clean, and consistent across breakpoints.
Show layout guides
Before adjusting a grid, you need to make sure layout guides are visible. Guides only appear when a breakpoint is selected.
Click the Framer logo in the top-left corner to open the main menu.
Hover over View to open the view options.
Click Show Guides to display grid overlays on the canvas.
If no breakpoint is selected, the Show Guides option won’t appear. Always confirm the correct breakpoint is active first.
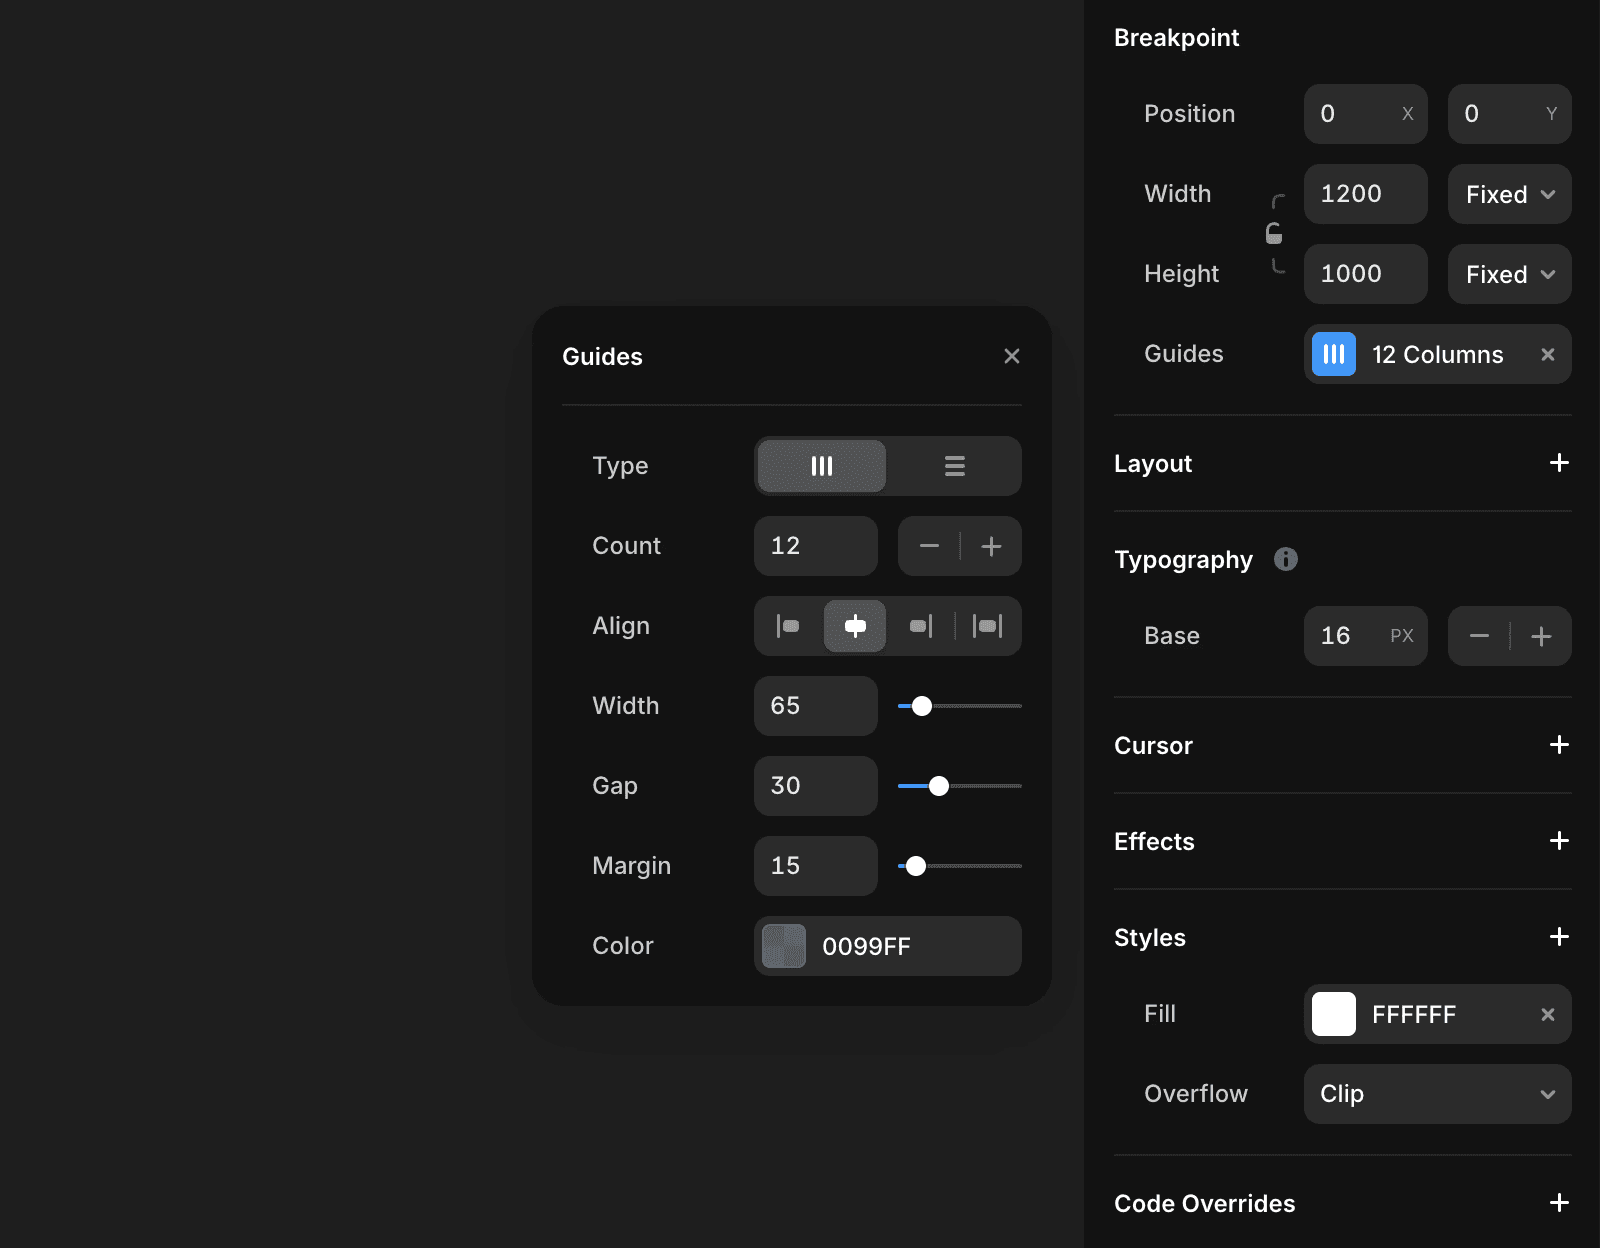
Adjust grid properties
Once guides are visible, you can fine-tune the grid for each breakpoint.
Select the breakpoint to edit.
In the right panel, adjust the grid settings:
Grid type: Choose columns or rows based on the layout structure.
Gap: Control spacing between grid items.
Margins: Set outer spacing to give content room to breathe.
Width: Define the total grid width to control how wide content spans.
Each breakpoint can use its own grid settings, which makes it easy to adapt layouts for different screen sizes.
How do I add a layout grid in Framer?
To add a layout grid in Framer, click the Framer logo in the top-left corner and open the View menu. Then, select 'Show Guides' to display the grid overlays. You can also use the displayed keyboard shortcut.
What grid properties can I adjust in Framer?
Once your guides are visible, you can adjust several grid properties in the right panel: choose the grid type (column or row), define the gap between items, set the margins for padding, and customize the total grid width.
What should I do if I encounter issues with layout grids in Framer?
If layout grids are not appearing, first make sure a breakpoint is selected, because Show Guides only appears with an active breakpoint. Then enable Show Guides from Framer logo → View, and adjust the grid settings in the right panel.
Updated